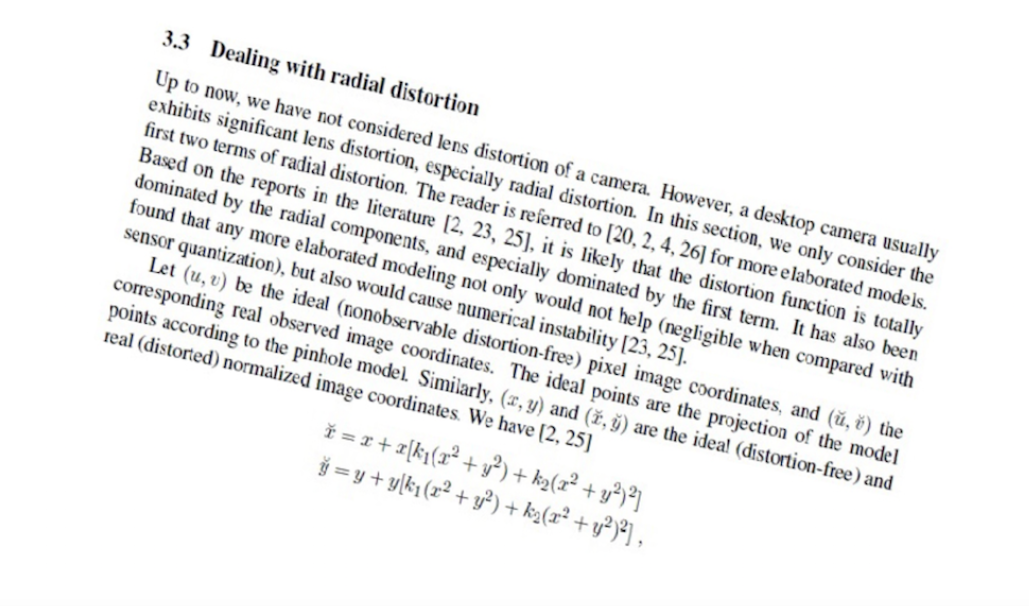
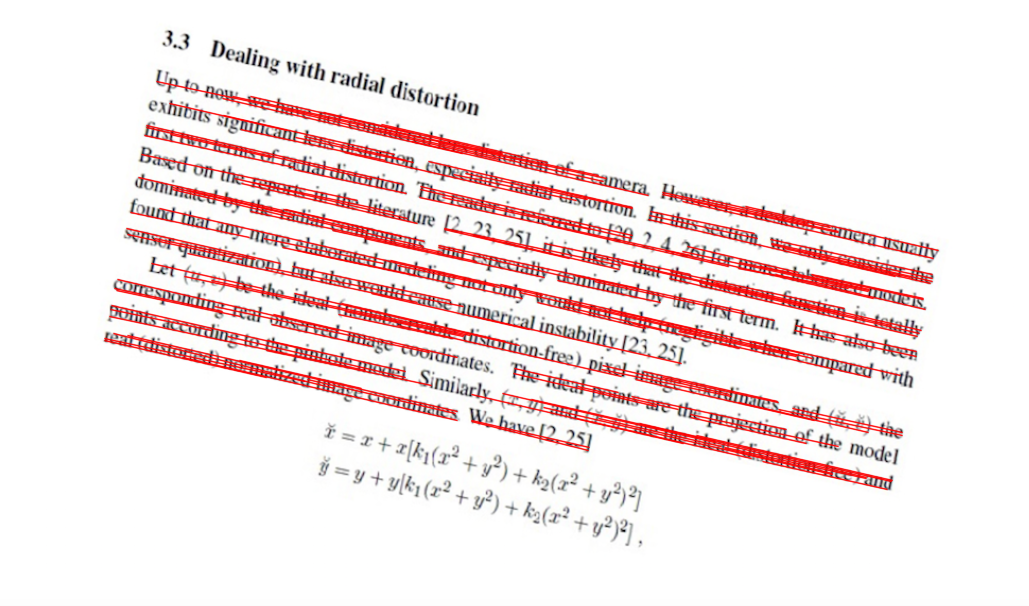
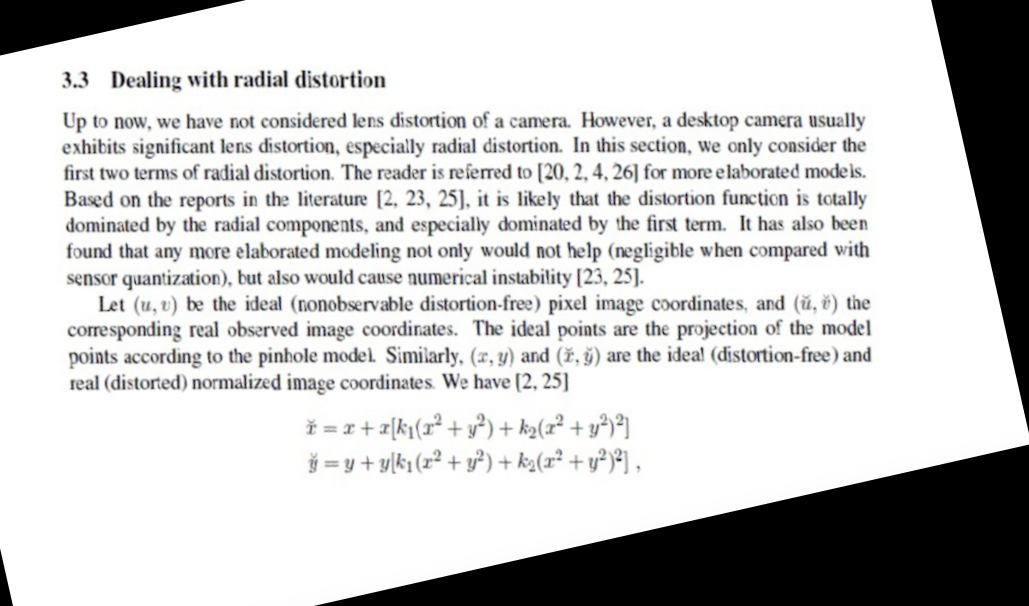
图像倾斜可以分为两种情况,一种是平面倾斜,这种情况下拍照设备与试卷平行,拍出来的图像只需要进行旋转即可完成矫正;另一种是Z轴倾斜,这种情况下拍照设备与试卷存在一定的角度,拍出来的图像要先进行透视变换,然后再进行旋转等操作才可以完成矫正。
图像倾斜矫正关键在于根据图像特征自动检测出图像倾斜方向和倾斜角度。 对于平面倾斜,先利用边缘(轮廓)检测算法算法找到图像的边界,然后利用 Radon变换法(基于投影的方法) 、 Hough变换法 、线性回归法等找到倾斜角度,然后再利用 仿射变换(affine transformation) 进行旋转。对于Z轴倾斜,先利用边缘(轮廓)检测算法找到图像的边界,然后利用 透视变换 把视平面上的点投影到现实平面,然后再利用仿射变换进行旋转。
下面介绍2种方法来处理文本倾斜
方法一:通过minAreaRect方法获得斜率
主要步骤:
1、输入图片
2、灰度化
3、图像取非
4、二值化
5、获得有文本区域的点集
6、求点集的最小外接矩形框,并返回旋转角度,将原图校正
参考代码:
# -*- coding: UTF-8 -*-

import numpy as np
import cv2

def rotate(image,angle,center=None,scale=1.0):
    (w,h) = image.shape[0:2]
    if center is None:
        center = (w//2,h//2)
    wrapMat = cv2.getRotationMatrix2D(center,angle,scale)
    return cv2.warpAffine(image,wrapMat,(h,w))

#使用矩形框
def getCorrect():
    fileName = "./img/f.png"
    img = cv2.imread(fileName)
    gray = cv2.cvtColor(img, cv2.COLOR_RGB2GRAY)  #把输入图像灰度化

    #图像取非
    grayNot = cv2.bitwise_not(gray)

    #二值化
    threImg = cv2.threshold(grayNot,100,255,cv2.THRESH_BINARY,)[1]

    #获得有文本区域的点集,求点集的最小外接矩形框,并返回旋转角度
    coords = np.column_stack(np.where(threImg>0))

    angle = cv2.minAreaRect(coords)[-1]
    print(angle)
    if angle < -45:
        angle = -(angle + 90)
    else:
        angle = -angle
    print(angle)
    #仿射变换,将原图校正
    dst = rotate(img,angle)
    cv2.imshow("dst",dst)
    cv2.waitKey()

if __name__ == "__main__":
    getCorrect()
方法二:通过霍夫变换、反三角函数获得斜率
主要步骤:
1、输入图片
2、灰度化
3、腐蚀、膨胀
4、边缘检测
5、霍夫变换得到线条并画出
6、计算角度
7、旋转角度,将原图校正
参考代码:
# -*- coding: UTF-8 -*-
import numpy as np
import cv2
import math

def rotate(image,angle,center=None,scale=1.0):
    (w,h) = image.shape[0:2]
    if center is None:
        center = (w//2,h//2)
    wrapMat = cv2.getRotationMatrix2D(center,angle,scale)
    return cv2.warpAffine(image,wrapMat,(h,w))
#使用霍夫变换
def getCorrect():
    #读取图片,灰度化
    fileName = "./img/s2.png"
    img = cv2.imread(fileName)
    gray = cv2.cvtColor(img, cv2.COLOR_RGB2GRAY)  #把输入图像灰度化
    #腐蚀、膨胀
    kernel = np.ones((5,5),np.uint8)
    erode_Img = cv2.erode(gray,kernel)
    eroDil = cv2.dilate(erode_Img,kernel)

    #边缘检测
    canny = cv2.Canny(eroDil,50,150)

    #霍夫变换得到线条
    lines = cv2.HoughLinesP(canny, 0.8, np.pi / 180, 90,minLineLength=100,maxLineGap=10)
    #drawing = np.zeros(img.shape[:], dtype=np.uint8)
    hImg = img.copy()
    #画出线条
    for line in lines:
        x1, y1, x2, y2 = line[0]
        cv2.line(hImg, (x1, y1), (x2, y2), (0, 0, 255), 1, lineType=cv2.LINE_AA)


    cv2.imshow("houghP",hImg)
    """
    计算角度,因为x轴向右,y轴向下,所有计算的斜率是常规下斜率的相反数,我们就用这个斜率(旋转角度)进行旋转
    """
    k = float(y1-y2)/(x1-x2)
    thera = np.degrees(math.atan(k))

    """
    旋转角度大于0,则逆时针旋转,否则顺时针旋转
    """
    print(thera)
    rotateImg = rotate(img,  thera)
    cv2.imshow("rotateImg",rotateImg)
    cv2.waitKey()

if __name__ == "__main__":
    getCorrect()
效果如下:
原图
霍夫变换效果
转换后的图

